Introduction
Snipe-IT is a Free Open Source (FOSS) web based project built on Laravel and it follows a standard Laravel MVC file structure.
Snipe-IT was made for asset management, to enable departments to track who has which asset, when it was purchased, which software licenses and accessories are available, and so on.
This project is actively developed and they release quite frequently. Check out the Snipe-IT website for a demo, a comprehensive list of features, screenshots and announcements for updates on new versions.
Overview
Once you've gotten your Snipe-IT settings all sorted, you'll want to think through exactly how your workflow currently functions, and what that should look like in Snipe-IT.
A common setup will have Assets being checked out to People, however you can also check out Assets to Locations and other Assets.
If you've already been using something (even spreadsheets) to keep track of your asset data, you probably already have a workflow of sorts, even if it's something very straightforward (and perhaps not even officially formalized), such as:
New employee is hired
Asset(s) are assigned to them
System is updated to reflect who the Asset is checked out to
Employee leaves, turns in Assets during final interviews
Asset is marked as "Pending Imaging" and added to the queue to be backed up/wiped
Asset imaging is completed, Asset is put back into circulation to be checked out to someone else
Some organizations will have different workflows, and Snipe-IT tries to be flexible enough to accommodate those as well. Additionally, how People and Assets get added into Snipe-IT may differ depending on your workflow. For example, for some organizations, this process is all manual (by choice). For others, they may use LDAP sync or rely heavily on importing assets to keep everything up to date. Even still others use the Snipe-IT API to automate some of these things to work with the other tools in their Asset Management toolchain.
New to Asset Management?
To figure out what workflow will be best for you, you'll need to examine what tools, IT support staff and other resources you have available to you - and don't panic. Even a straightforward, manual-only Asset Management program is better than spreadsheets, and your system will evolve over time as you tailor your workflow to your own organization and resources. Snipe-IT can grow with you as you refine your process.
Getting Started
Admin Settings

Admin Settings are available only to super-admins of the system. They control settings such as branding, colors, logo, alert thresholds, LDAP configuration, two-factor authentication, password security and much more. See Admin Settings documentation for more details.
Adding Assets from CSV

How to best start adding assets depends on what information you have to start with. If you have an existing CSV (Google Doc, etc) with asset data in it, your first step will be importing your assets through the Import tool. See the Importing Assets and More documentation for details and sample CSVs.
Adding Assets Manually
If you don't have any existing asset data and you're just getting started on developing your asset management program, you'll likely want to start by creating Categories and then Asset Models.
Think of categories as high-level descriptions of your assets, for example "Laptops", "Desktops", "Servers", etc. You'll want to adapt this for the types of assets you have, but Categories are important because you'll determine whether or not assets require your users to accept delivery and/or EULAs of the assets, and whether they should get email notifications on asset checkout/checkin.
You can learn about how to add assets manually using this guide.
Adding Assets via the API
Snipe-IT comes with a powerful API that lets you add/update assets, users and more. If you have multiple systems that are already scripted, using the API might be your best bet. You'll find comprehensive instructions on using the API here .
Note: Adding assets via the API is recommended for developers or folks familiar with scripted languages only.
Hooking up LDAP
You'll find the LDAP settings in Admin Settings > LDAP. It can be a little tricky to get LDAP working to start with, and it's difficult for us to document that, since everybody's LDAP/Active Directory is set up differently, but the LDAP Sync & Login documentation has examples of the most common settings within LDAP and Active Directory.
Making Assets Available to Only Certain People

If you'd like to limit the assets that your users can see within your Snipe-IT setup, you'll want to enable Full Multiple Company Support and use different "companies" to segment those users and assets. (Companies within Snipe-IT don't have to be actual companies - some users prefer to treat them more as roles or departments.) You can learn more about Full Multiple Company Support here.
Importing Custom Fields
Custom fields allow you to include arbitrary data with your assets that doesn't come out of the box in Snipe-IT. Learn more about how to set up your Custom Fields here, and then how to import those custom fields here.
Permissions
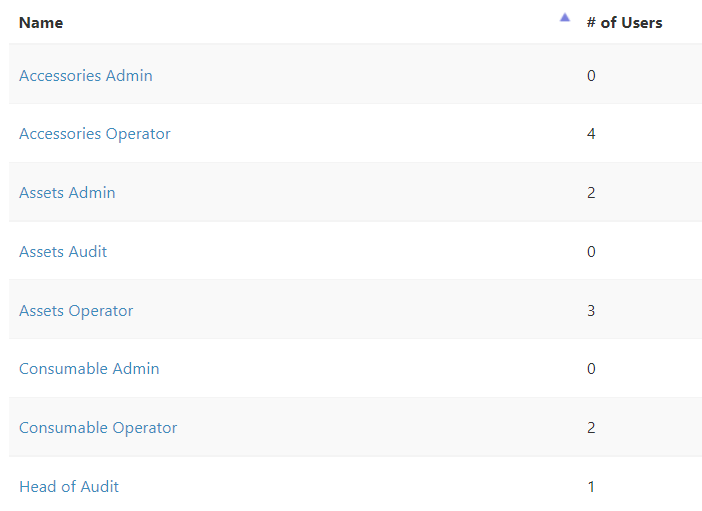
Snipe-IT comes with a sophisticated permissions system that allows you to control what actions your users can and cannot do.
A common setup for many organizations is to have a small handful of Superadmin or Admin users who do the checking in and checking out for the organization, and all of the other users are created without any special permissions. Users who are created without any management permissions will only be able to see items checked out to them, or items they have requested.
Labels
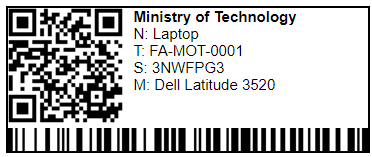
The way labels work with Snipe-IT, they get generated with a QR code and/or a UPC-style barcode. The QR code allows you to easily scan the code to open the link to that asset on your mobile device, while the UPC-style barcode is designed to be used in the top search in your Snipe-IT UI.
While you can use your own pre-existing labels for your assets in Snipe-IT, you won't get that built-in QR code/top search functionality with them. If you don't need that functionality and already have labels printed out for your assets that include the asset tag, etc, feel free to use your own.
Asset Tags
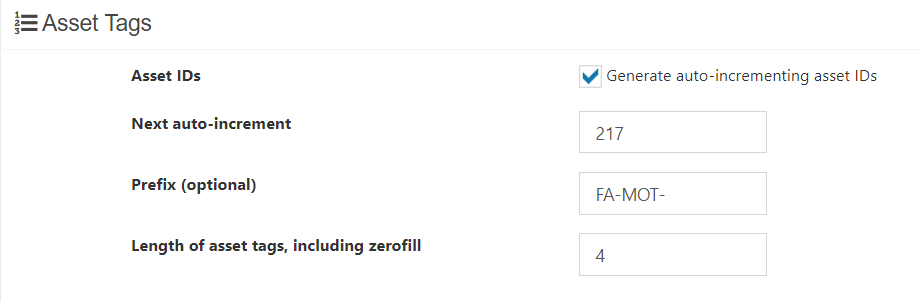
Asset tags are a unique identifier for assets within your system. Each one must be unique, and is often used in conjunction with Asset Labels. They identify each unique piece of hardware so that you know which specific device it is.
For users who don't need asset labels, the unique serial number of each device is often used as the asset tag, or you can turn on auto-incrementing asset tags in Admin > Settings, which will generate a unique asset tag for you when you create new assets.
Checkin/Checkout
Checking in and checking out are two primary concepts within Snipe-IT. When you checkout an asset, license or accessory, you’re marking them as being in the possession of someone else. This means that they cannot subsequently be checked out to another person until they are checked back in. This prevents “double-booking” assets, where one asset has been promised to or assigned to multiple people.
When an employee leaves your company, or if an asset, license or accessory is not functioning properly, you would check it back in. Checking it back in indicates that it’s back in your possession, or potentially out for repair. It’s up to you to decide what status to assign it, based on the condition of the asset.
Status Labels
Status labels are used to describe the state of the asset. You can add as many status labels as you’d like. Each status label will have one of four characteristics that describe the state of assets with that status label:
Status Label Type Description Undeployable These assets cannot be assigned to anyone. Deployable These assets can be assigned to people Archived These assets cannot be assigned to people, and will only show up in the Archived view Pending These assets can not yet be assigned to anyone. Use status labels however you see fit. You can just keep the starter labels we set up for you, or you can flesh out a detailed set of statuses that will make sure your team always knows exactly what’s going on with each asset.
If you set up your status labels well, they can be enormously useful. A status label that is a pending label named “Awaiting Re-Imaging” tells your team that this item can’t be deployed because it’s still in the re-imaging stage and isn’t ready yet. Once it’s ready, your team can update the status to “Ready to Deploy”, and then it’s added to the pool of available deployable resources.
*Once an asset that belongs to a status that is "Deployable" is assigned to a user, it assumes the meta status of "Deployed".
Column Selection
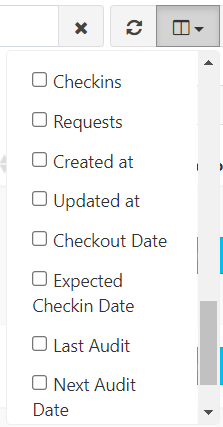
In most of the table-based interfaces in Snipe-IT, you have the option of showing or hiding specific columns, so that columns you don't care as much about don't take up space on your screen, and columns you do care about are easily visible.
To use this feature, simply click on the icon that looks like a split-pane window in the top-right of the table interface. Checking and unchecking the checkmarks next to the column name will show and hide the columns accordingly.